If you are experiencing issues with the Auto Assign feature, the following steps will help troubleshoot common causes:
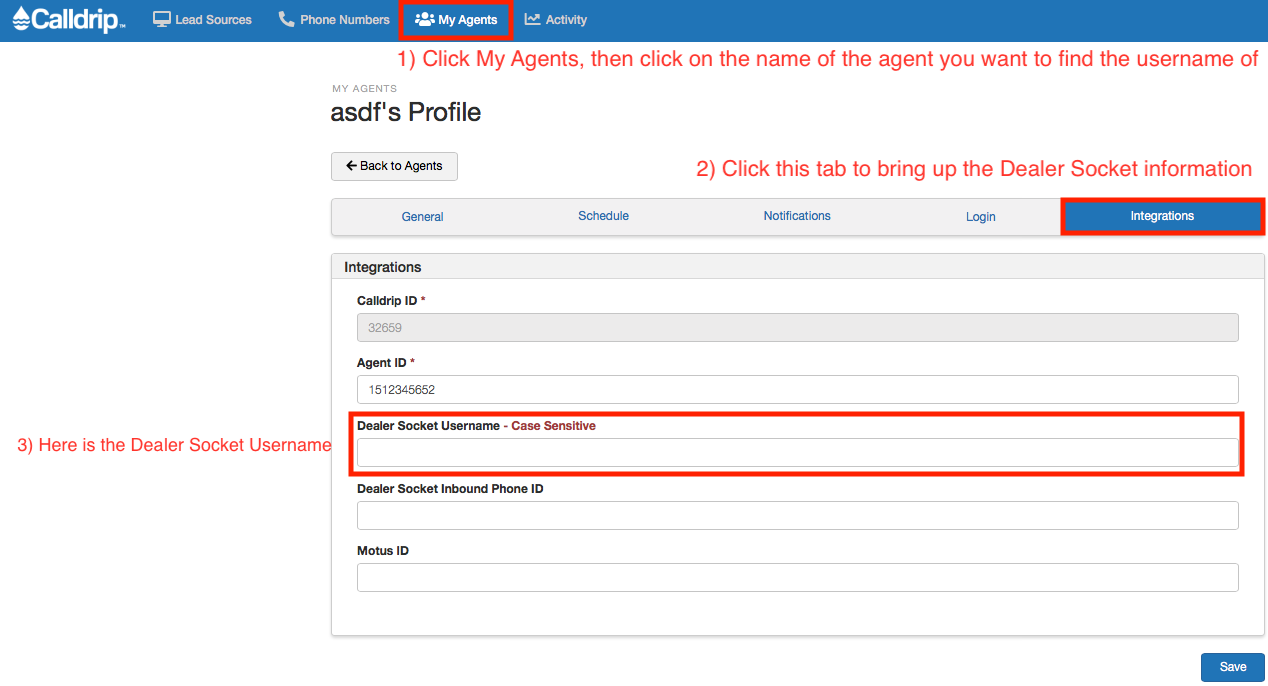
1. Check DealerSocket ID in your agent profile. This is your DealerSocket username, and is case sensitive. The DealerSocket ID must be entered in exactly as it appears in DealerSocket, or the Auto Assign feature will not function properly.
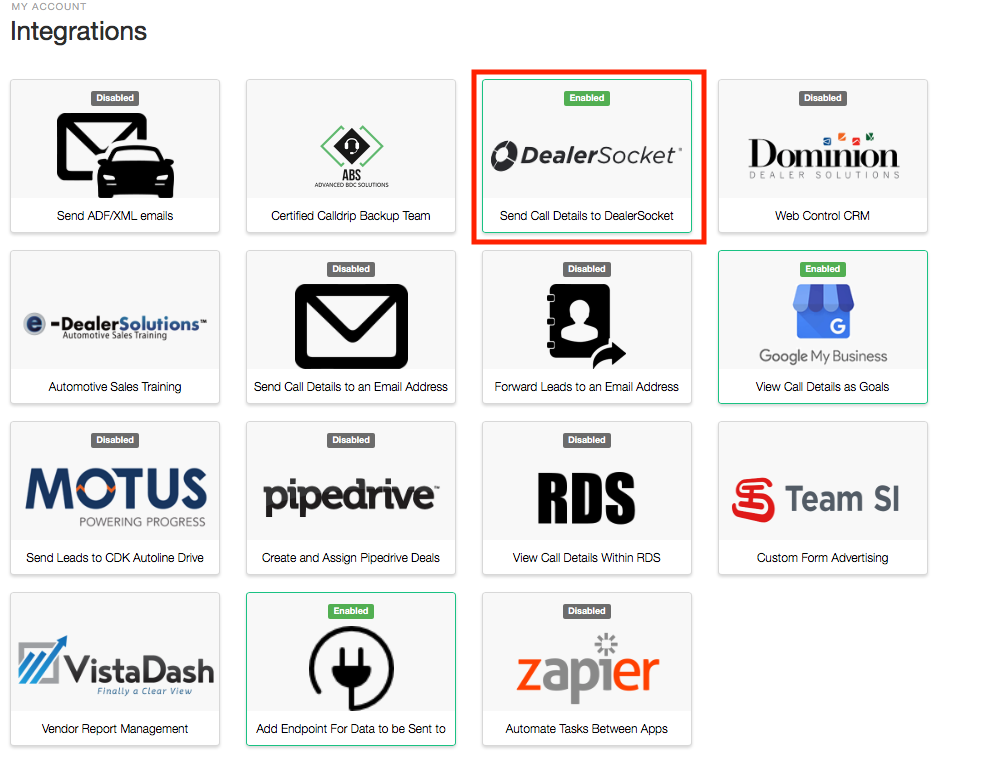
2. If your DealerSocket ID is correct, next you will want to check that the integration is enabled for your account.
2a. First, navigate to Your Account settings, in the top right of your screen.

2b. Then, select Integrations - DealerSocket.

2c. Within your integration dashboard, make sure that DealerSocket is enabled. If not, click on it.
 2d. Within your DealerSocket Integration settings, ensure that "Send Work Note Updates" is selected. Now hit update.
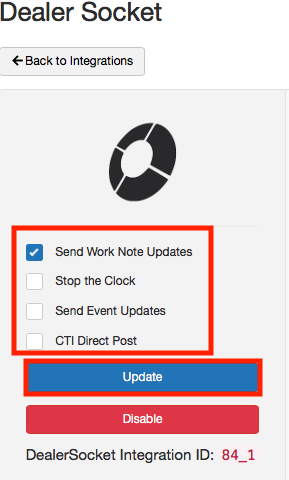
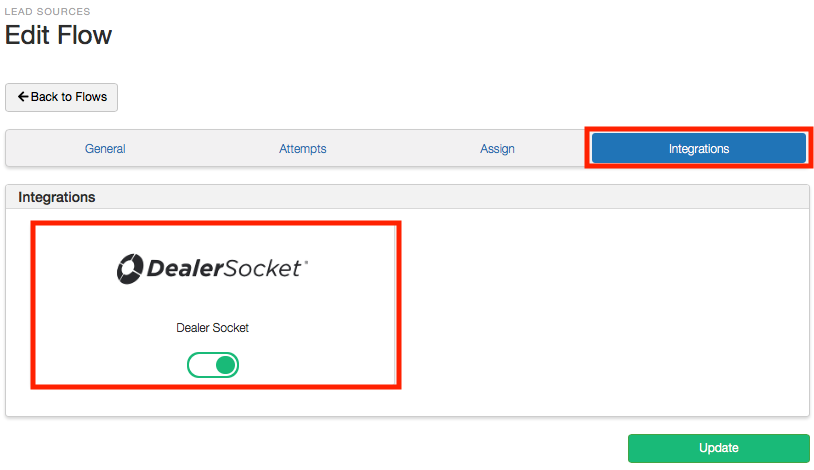
3. After you have ensured that the integration has been enabled for your account, you will need to check that the integration is enabled within your flow.
3a. Navigate to the current flow you are using. If you are using multiple call flows you will need to update this for each one. Your Call Flows can be found under Lead Sources.
3b. Under the integrations tab of your call flow ensure that the DealerSocket integration is turned on.
4. If you are still experiencing issues with your Calldrip/DealerSocket integration, please reach out to our support department.
No results found